Would you like to write your first Linux device driver? Awesome! Don’t you know where to start? Say no more, I am going to show you a very basic development environment with cheap hardware.
Content:
- Requirements
- Installing Raspberry Pi OS
- Cross-compiling and loading a newer kernel
- Ready to hack. Next steps?
1. Requirements
For this tutorial we are going to use a System-on-Chip (SoC). Could you program and test drivers with your PC? Of course, but a SoC will offer you more interfaces (I2C, SPI, etc.) out of the box and connections to custom hardware will be easier. Furthermore, learning how to deal with embedded systems is both fun and very useful for your future career as a kernel developer, professionally and/or as a hobbyist.
We will go for the easiest and most mainstream SoC-based setup, so you can find information for any further steps easily. This is what you need:
-
Raspberry Pi: in principle you can use any Raspberry Pi, but given that we are aiming for cheap hardware, a Raspberry Pi Zero (I have the 2 W model) is a good option for around $20. More expensive models provide nice features like Gigabit Ethernet and more HDMI/USB ports, but they are also bulkier and consume more power. Just choose the one you prefer.
-
USB power supply: depending on the Raspberry Pi you have, you will need either a micro or type-C USB power supply. There are tons of them out there and any [5V, 2.5-3A] will work. I would recommend you getting one with an ON/OFF switch, but it is not mandatory. The most basic models cost less than $5.
-
MicroSD card and card reader: you can choose the size you like and 32-64 GB are usually recommended, but I have been using 8 GB (you will find them for less than $4) for years and at least for Raspberry Pi OS Lite it is more than enough. A microSD card reader will be required as well, but that will not break the bank (basic models for less than $2).
-
Host machine: the computer you will be using for the development. Using the target device for the development is possible, but trust me on this: use the regular approach from the beginning and save time in the long run. Any standard computer will be ok, even a second Raspberry Pi or any other SoC. Is a Linux-based OS mandatory? Of course it is, and it always was

Some optional pieces of hardware that are nice for development are a USB keyboard and an HDMI monitor, plus the cables to connect them to the Raspberry Pi. You can do without them via SSH, but in some situations they are handy. If your Raspberry Pi has an Ethernet connector, you could get an Ethernet cable and step up to network booting, which is indeed the common approach in professional environments. But we will keep it simple here and stick to the SD card.
Host machine and optional stuff aside, you can get the hardware I listed for around $30.
2. Installing Raspberry Pi OS
Rolling your own distro with Yocto is amazing, but overkill for a beginner. So let’s focus on what really matters for this article and install a distro that just works, Raspberry Pi OS. I like the 64-bit Lite version (no desktop environment) because it is fast and light, so I will favor that one here. Feel free to choose a different one if you like.
There is a friendly tool for that called Raspberry Pi Imager (available here if your distro does not have the package, or you want the latest version) and that is exactly what we are looking for: friendly tools for a beginner-friendly workflow.
-
Install:
sudo apt install rpi-imager. I got version 1.7.3. -
Open:
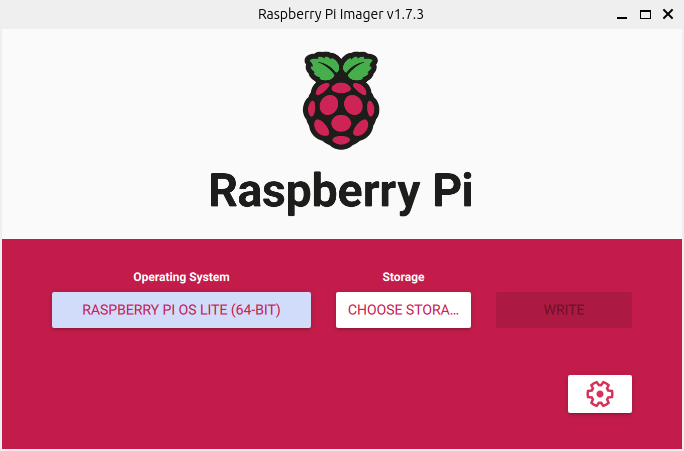
rpi-imager. The version I got looks like this:
Your version might look a bit different. The worklow will be almost identical -
Click on CHOOSE OS → Raspberry Pi OS (other) → Raspberry Pi OS Lite (64-bit).
-
Insert the microSD card and click on CHOOSE STORAGE → select the microSD.
-
Click on Settings (the gearwheel). Set username and password, configure wireless LAN, and enable SSH (not mandatory if you connect a spare monitor and keyboard).
-
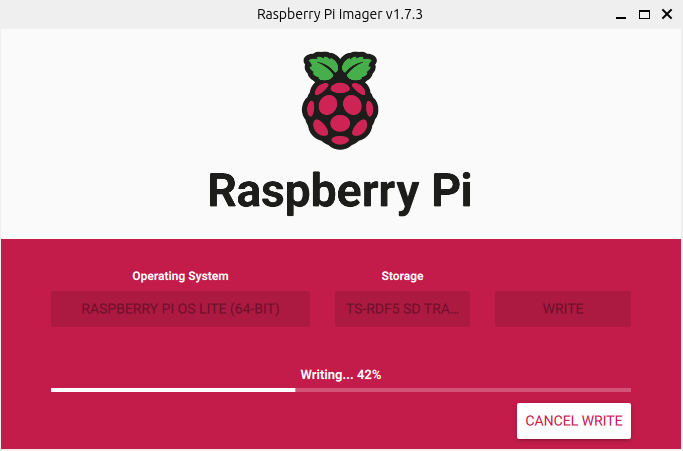
Click on WRITE. Two partitions will be created -usually named sd{a,b,c}1 and sd{a,b,c}2- for the FAT filesystem (boot) and the ext4 filesystem (root), respectively. We will talk about them again later. Extract the microSD when it finishes, then insert it into the slot on the Raspberry Pi.

The Answer to the Ultimate Question of Life, the Universe, and Everything -
Power on your fully functional SoC. If you only have access via SSH, you can either find out what IP address was assigned to your Raspberry Pi (easy to google, beyond this article) or simply run (for default username, hostname and a single Raspberry Pi):
ssh pi@raspberrypi.local
3. Cross-compiling and loading a newer kernel
The OS you installed will probably use a stable kernel, but we want to develop new drivers and therefore we should work with a newer kernel. Otherwise, some new features and APIs will not be available, so we might run into conflicts once we try to contribute upstream, which is something we should always do. Let’s keep it simple again and clone the Raspberry Pi fork of the Linux kernel:
git clone git@github.com:raspberrypi/linux.git
Could you use the mainline kernel from Linus Torvalds’ repo instead? Yes, you could. But you would be missing raspberry-specific patches and some issues might arise (or not, but let’s move on). Remember, friendly workflow first.
The Raspberry fork is actually not far behind the latest mainline kernel and you will find a branch based on a pretty recent tag. At the moment of writing v6.7 was released 10 days ago and the rpi-6.7.y branch is based on v6.7-rc8. Not bad, definitely good enough. There are 746 patches on top of the tag, and I suppose they do something good for my Raspberry Pi, so let’s use this branch:
git checkout rpi-6.7.y
Given that we are using a host (again, your development machine, probably x86) to compile the code that will run on the target (again, the Raspberry Pi, arm64), the kernel code will need to be cross-compiled (compiled for a machine with a different architecture than the one your machine is based on). The steps to cross-compile and install this newer kernel is well documented here, but to make things even easier, let’s summarize the steps for the Zero 2 w and a 64-bit kernel:
-
Install dependencies to build the kernel (why did you not install them yet???):
sudo apt install git bc bison flex libssl-dev make libc6-dev libncurses5-dev -
Install the 64-bit toolchain:
sudo apt install crossbuild-essential-arm64 -
Go to the root directory of the kernel repository you cloned before and enter these commands to set the configuration:
KERNEL=kernel8 make ARCH=arm64 CROSS_COMPILE=aarch64-linux-gnu- bcm2711_defconfig -
Build kernel and device tree files. What is a device tree? A good topic for another article

make ARCH=arm64 CROSS_COMPILE=aarch64-linux-gnu- Image modules dtbs -j$(nproc)Note the -j parameter to run jobs in parallel, usually you can use up to 2 * nproc threads, but check what works for you.
-
Create the following directories to mount the card partitions we mentioned before:
mkdir mnt mkdir mnt/fat32 mkdir mnt/ext4 -
Insert the microSD card into the host and install the kernel, modules and overlays. In my case a call to the
lsblkcommand returns sda1 and sda2 as the names of the partitions, so check if that is also your case or on the contrary, you get ‘b’ or ‘c’ instead of ‘a’. Adapt the following lines accordingly and make a script out of them so you can automate the process. But first open the config.txt file (an important configuration file documented here) under the bootfs partition and add the following line:kernel=kernel-myconfig.imgWhy would you do that? It is explained in the documentation, but basically you will keep the original kernel (managed by the system and update tools) as a backup in case your custom kernel does not boot.
# mount SD partitions sudo mount /dev/sda1 mnt/fat32 sudo mount /dev/sda2 mnt/ext4 #install kernel modules sudo env PATH=$PATH make ARCH=arm64 CROSS_COMPILE=aarch64-linux-gnu- INSTALL_MOD_PATH=mnt/ext4 modules_install #copy custom kernel keeping the original one as backup (add kernel=kernel-myconfig.img to config.txt) sudo cp arch/arm64/boot/Image mnt/fat32/kernel-myconfig.img #install overlays sudo cp arch/arm64/boot/dts/broadcom/*.dtb mnt/fat32/ sudo cp arch/arm64/boot/dts/overlays/*.dtb* mnt/fat32/overlays/ sudo cp arch/arm64/boot/dts/overlays/README mnt/fat32/overlays/ #unmount SD partitions sudo umount mnt/fat32 sudo umount mnt/ext4 -
Insert the card into the target, power on and check your kernel version:
 ssh pi@raspberrypi.local
 pi@raspberrypi.local's password:
 Linux raspberrypi 6.7.0-rc8-v8+ #2 SMP PREEMPT Wed Jan 17 19:54:37 CET 2024 aarch64

 The programs included with the Debian GNU/Linux system are free software;
 the exact distribution terms for each program are described in the
 individual files in /usr/share/doc/*/copyright.

 Debian GNU/Linux comes with ABSOLUTELY NO WARRANTY, to the extent
 permitted by applicable law.
 Last login: Wed Jan 17 17:43:05 2024 from XX.XX.XX.XX
 pi@raspberrypi:~ $
Happy days!
4. Ready to hack. Next steps?
Now that you have a decent setup, I would recommend you to update the system, play a bit with raspi-config or edit the config.txt file to enable some interfaces you might use to connect to external devices (again: I2C, SPI, etc.) and tweak other settings to your needs. I am planning to write some follow-up articles about how to program device drivers by taking real examples I sent upstream, so you will learn how to work with such interfaces as well.
But until then, you might want to continue learning by yourself. Why don’t you take a look at simple drivers in the kernel repo? Did you find a device you want to use and the kernel does not support yet? If that’s the case, nothing is keeping you from programming your first Linux device driver… anymore.
Enjoy and share knowledge!